

构建由 WordPress 驱动的前端应用程序 需要 WP REST API 和 AngularJS 的知识。 您可以使用 WordPress 作为后端构建任何应用程序。 您可以摆脱 WordPress 中流行的传统主题和管理模式。
在本文中 构建由 WordPress 驱动的前端, 我们将创建一个包含特色帖子、类别和用户列表页面的界面。
您将需要线框的帮助 构建一个 WordPress 驱动的前端应用程序。
项目概况
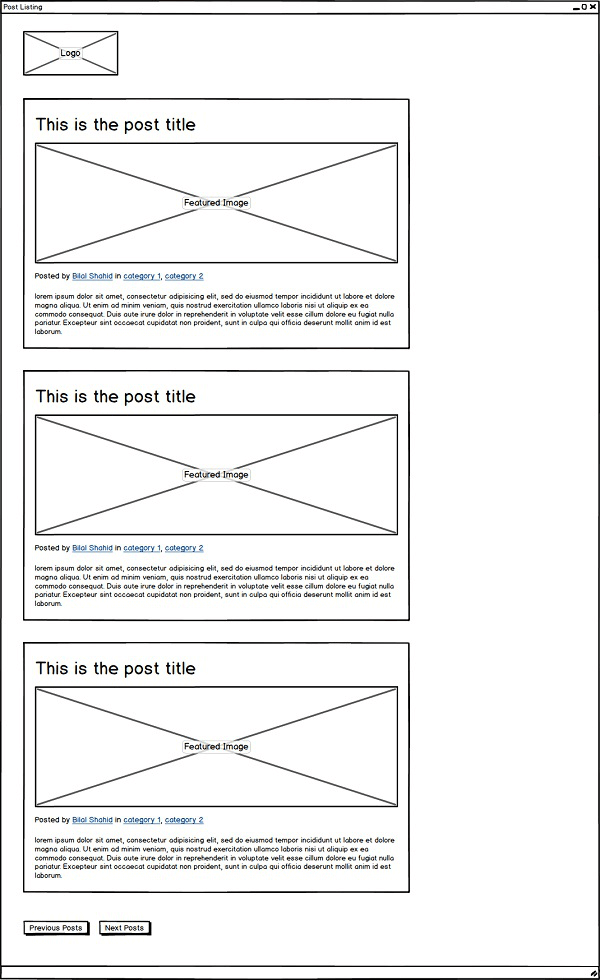
是时候了解需求并规划整个项目了。 我们需要的第一件事是列出帖子、用户和类别的页面和单曲页面。
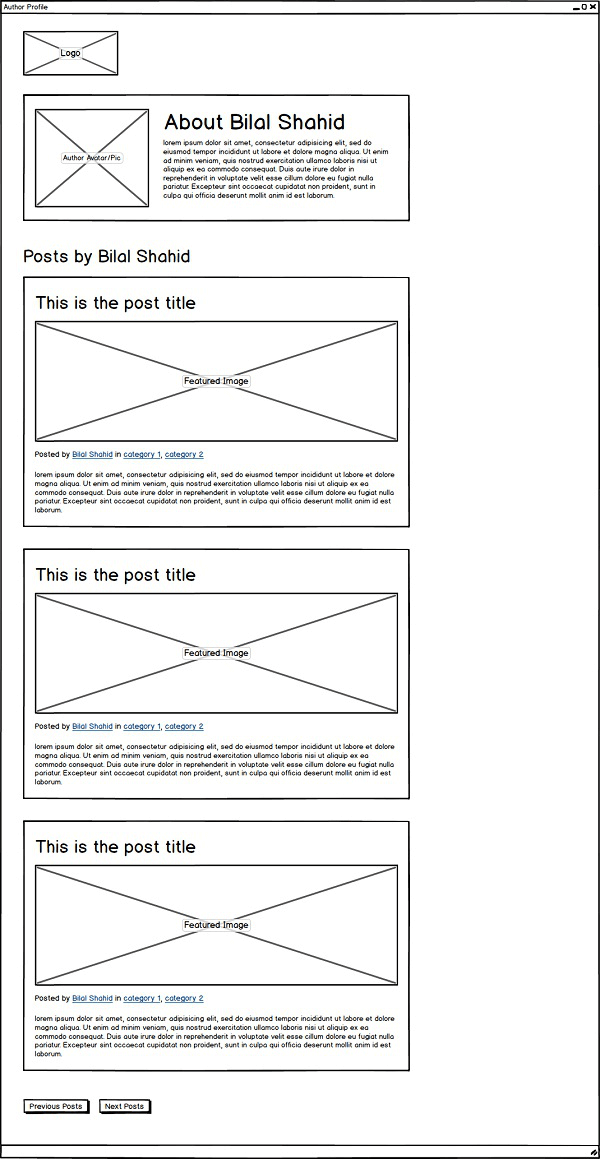
因此,我们需要这些页面的模板。 列表页面将显示一定数量的带有分页的帖子。 以下是列表页面的大致外观。
以下是单个帖子模板的外观。
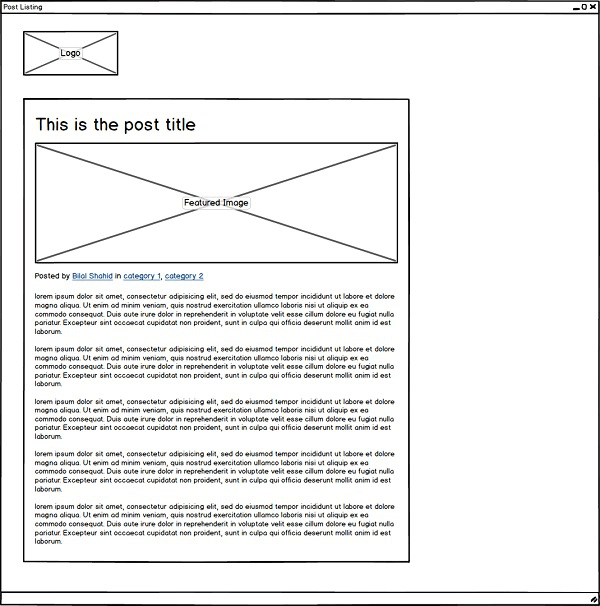
WP REST API 提供了线框中的大部分功能,但我们必须自己添加一些附加功能,例如特色图像链接、类别名称和作者姓名。
让我们更进一步,分析类别和帖子线框应该是什么样子。 这就是类别模板的外观。
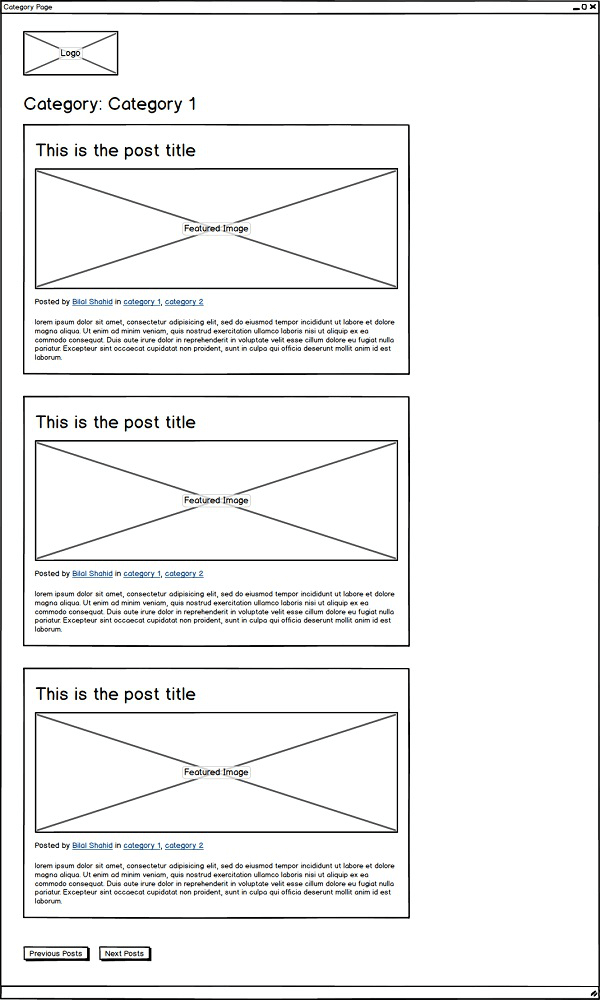
这就是用户模板的外观。
要拥有其中一些功能,您需要一个配套插件。 您还会注意到,所有这些模板中的某些功能都是通用的,因此,我们应该创建通用的 AngularJS 指令,以便可以共享通用功能并且没有重复。
要求
在开始项目之前,您需要安装一些应用程序。
1. Node.js 用于处理某些命令。
2. GulpJS 用于优化和 Git 用于克隆
3. 使用 WP REST API 插件安装 WordPress
在 Github 命令行中,您必须编写以下代码来克隆 HTML 包存储库 -
$ git clone https://github.com/bilalvirgo10/quiescent-rest-api-html.git
$ cd path/to/cloned/repository
The following line will install Node.js modules.
$ npm install
安装需要一些时间,然后使用 $ gulp 命令执行源代码。 这将创建一个名为“dist”的文件夹,其中保存了所有已编译的源文件。
是时候构建 Companion 插件了——
正如我们之前所说,我们需要为 构建一个 WordPress 驱动的前端应用程序. 以下是我们将通过构建配套插件来实现的目标。
这些功能包括帖子的特色图片、帖子的作者姓名以及来自 Gravatar 帐户的作者图片,最后是每个帖子的类别列表。
转到您的 wp-content/plugins 文件夹并将其命名为与您的插件相同。 例如,我们将使用 quiescent-companion。
进入文件夹并创建一个与文件夹同名的 php 文件。 打开它并粘贴以下代码,这只是创建插件的正式开始。
/**
* Plugin Name: Quiescent Companion
* Description: Plugin to work with the Quiescent WP REST API theme
* Author: Bilal Shahid
* Author URI: http://imbilal.com
*/
为特色图片构建自定义字段
粘贴以下代码,该代码旨在为帖子创建特色图片。 基本上,它将创建一个自定义字段,您可以像添加特色图像一样添加特色图像。
/**
* Modifying the response for the Post object
*/
function quiescent_modify_post_response() {
// adding a field for the featured image
register_rest_field( 'post', 'quiescent_featured_image', array(
'get_callback' ='quiescent_get_featured_image',
'update_callback' = null,
'schema' = null
) );
}
add_action( 'rest_api_init', 'quiescent_modify_post_response' );
以下代码用于为特色图像的自定义字段命名并检索图像。
/**
* Function to retrieve featured image link
*/
function quiescent_get_featured_image( $post, $field_name, $request ) {
$attachment_id = $post['featured_media'];
$attachment_info = wp_get_attachment_image_src( $attachment_id, 'quiescent_post_thumbnail' );
return $attachment_info[0];
}
使用 last created 方法,您可以检索有关帖子的大量信息,例如其 ID、标题、内容等。
以下代码用于为特色图像创建自定义尺寸。 尺寸一直保持在 712 x 348 像素。
**
* Adding image size for the featured image
*/
function quiescent_add_image_size() {
add_image_size( 'quiescent_post_thumbnail', 712, 348, true );
}
add_action( 'init', 'quiescent_add_image_size' );
保存文件,因为添加了第一个自定义字段,还有两个。
相关文章:WordPress块编辑器中的封面图片与特色图片
为用户和类别构建自定义字段
以下是添加字段以显示作者姓名的代码。
// adding a field for author name
register_rest_field( 'post', 'quiescent_author_name', array(
'get_callback' = 'quiescent_get_author_name',
'update_callback' = null,
'schema' = null
) );
/**
* Function to retrieve author name
*/
function quiescent_get_author_name( $post, $field_name, $request ) {
return get_the_author_meta( 'display_name', $post['author'] );
}
以下代码用于添加类别名称。
// adding a field for categories
register_rest_field( 'post', 'quiescent_categories', array(
'get_callback' = 'quiescent_get_categories',
'update_callback' =null,
'schema' = null
) );
/**
* Function to retrieve categories
*/
function quiescent_get_categories( $post, $field_name, $request ) {
return get_the_category( $post['id'] );
}
保存该字段,现在我们将 quiescent_featured_image、quiescent_author_name、quiescent_categories 作为现成形式不存在的特征的三个不同自定义字段。
获取 Gravatar 图像 Pn 207 x 207 像素格式
最后缺少的是来自 Gravatar 的作者照片。 以下代码仅用于此目的。
/**
* Modifying the response for the User object
*/
function quiescent_modify_user_response() {
}
add_action( 'rest_api_init', 'quiescent_modify_user_response' );
/**
* Modifying the response for the User object
*/
function quiescent_modify_user_response() {
// adding a field for 207 X 207 avatar
register_rest_field( 'user', 'quiescent_avatar_url', array(
'get_callback' ='quiescent_get_user_avatar',
'update_callback' = null,
'schema' = null
) );
}
/**
* Retrieving the avatar for the user
*/
function quiescent_get_user_avatar( $user, $field_name, $request ) {
$args = array(
'size' = 207
);
return get_avatar_url( $user['id'], $args );
}
现在,您需要做的就是为资源和资源创建模板、路由和服务 完成构建一个 WordPress 驱动的前端 容易地。